What Is Kohler Illumination – Here’s the Answer
Köhler illumination guarantees you get uniform, high-contrast lighting by precisely aligning optical components like the condenser, field diaphragm, and aperture diaphragm. It eliminates uneven light and glare, enhancing image clarity and resolution for reliable microscopy results. By adjusting the diaphragms and lamp filament position, you balance contrast and detail ideally.
Proper setup requires care but greatly improves image quality. Keep exploring to understand the exact steps and common pitfalls for mastering this essential technique.
What Is Köhler Illumination and Why It Matters
What makes Köhler illumination indispensable in microscopy? It provides uniform, high-contrast lighting by precisely aligning the light source image into the condenser’s back focal plane, eliminating uneven light patterns.
You adjust the condenser diaphragm to control the illumination cone angle, which directly influences resolution and depth of field.
This alignment notably enhances illumination quality by reducing glare and stray light, which otherwise degrade image clarity. Köhler illumination’s ability to evenly illuminate the sample ensures consistent contrast across the field of view. This is essential for brightfield and fluorescence microscopy.
By mastering Köhler illumination, you optimize the condenser diaphragm settings to balance brightness and resolution, achieving superior optical performance.
This technique, introduced by August Köhler in 1893, remains fundamental for precise microscopic imaging and analysis.
How Optical Components Work in Köhler Illumination
You’ll find that Köhler illumination relies on a carefully arranged light path. Basically, the collector lens focuses the light source onto the field stop diaphragm, which helps control the area that gets illuminated.
Now, the diaphragms are really important here. The field stop ensures that the field is evenly lit, so you don’t get any dark spots or uneven brightness.
At the same time, the condenser aperture adjusts the angle of the light cone. This adjustment has a direct impact on the resolution and contrast of what you’re viewing.
When you understand how all these components work together, it becomes clear how Köhler illumination achieves such uniform and high-quality lighting. It’s all about precise coordination to get the best possible image.
Light Path Components
Although Köhler illumination relies on several optical components working together, understanding the light path starts with how the collector and field lenses focus light through the condenser aperture and field diaphragms.
The collector lens images the light source precisely at the condenser’s front focal plane, which ensures uniform illumination.
This focused light then passes through the condenser aperture diaphragm. This diaphragm controls the cone angle entering the objective, directly affecting resolution and contrast.
The condenser shapes the light rays into a structured, evenly distributed beam that consistently illuminates the specimen.
Proper alignment of these components guarantees that conjugate planes—including the lamp filament, condenser aperture, and back focal plane—are accurately focused.
This optimizes illumination quality.
Having precise control over the light path is key to achieving Köhler illumination’s signature uniformity and clarity.
Diaphragm Roles
How do the diaphragms in Köhler illumination shape image quality? The field diaphragm controls the size of the illuminated area on the specimen, which helps limit stray light and boosts contrast. When you adjust this diaphragm, you’re basically confining the light to just the region you want to see.
On the other hand, the condenser aperture diaphragm changes the cone angle of the light entering the condenser. Opening it widens the light cone, which improves resolution but can lower contrast. Closing it does the opposite — you get better contrast but lose some resolution.
It’s important to make sure both diaphragms are properly aligned. This means the light source is sharply focused and centered in the condenser’s back focal plane, which is key for uniform illumination.
Getting the hang of these adjustments is essential for optimizing Köhler illumination and balancing resolution with contrast to get the best image quality.
Step-by-Step Guide to Setting Up Köhler Illumination
Start by aligning the light source to make sure you get even illumination across your sample.
Then, go ahead and adjust the field diaphragm. This helps you control the illuminated area more precisely and cuts down on any stray light.
Finally, set the aperture diaphragm to get the best resolution and contrast, depending on the numerical aperture of your objective.
Aligning Light Source
Why is aligning the light source essential for Köhler illumination? Proper alignment ensures uniform illumination and ideal image contrast.
Begin by focusing on the sample at low magnification and closing the field diaphragm to reveal its edges clearly. Next, adjust the condenser focus until the field diaphragm edges appear sharp and well-defined in the image.
Use the X and Y adjustment screws to center the condenser so the illuminated field aligns perfectly with the optical axis.
Gradually open the field diaphragm until its edges just contact the field of view, reducing stray light.
Finally, set the condenser aperture diaphragm to about 70-80% of the full light cone, balancing resolution and contrast.
This precise alignment of the light source is critical for achieving Köhler illumination’s hallmark image quality.
Adjusting Field Diaphragm
After aligning the light source, the next step in setting up Köhler illumination involves adjusting the field diaphragm. Start by closing the field diaphragm completely. Then, slowly open it until its edges are just visible in the field of view.
Use the condenser focus to sharpen these edges so they appear well-defined. Next, center the condenser using the X and Y adjustment screws. This helps the illuminated circle align precisely with the center of the field of view.
Gradually open the field diaphragm until it just fills the entire field of view. Doing this minimizes stray light and enhances contrast. Make sure the diaphragm’s edges touch all four corners evenly to guarantee uniform illumination.
This precise adjustment of the illumination optimizes image quality by controlling the illuminated area effectively. Taking the time to get this right really makes a difference when you’re looking at your sample.
Setting Aperture Diaphragm
How do you achieve the ideal balance between resolution and contrast when setting the aperture diaphragm? Precise adjustment of the condenser aperture diaphragm is key. Here’s how to optimize it:
First, remove the eyepiece or view the back focal plane of the objective to observe the light cone size.
Then, adjust the condenser aperture diaphragm to about 70-80% of the objective’s numerical aperture.
Open the aperture diaphragm until the light cone just fills the field of view without creating diffraction fringes or artifacts.
Next, use the image of the condenser aperture diaphragm in the back focal plane to fine-tune its size.
Make sure it’s neither fully closed nor fully open.
This careful calibration balances illumination, maximizing resolution and contrast under Köhler illumination.
How to Align the Lamp Filament for Even Lighting
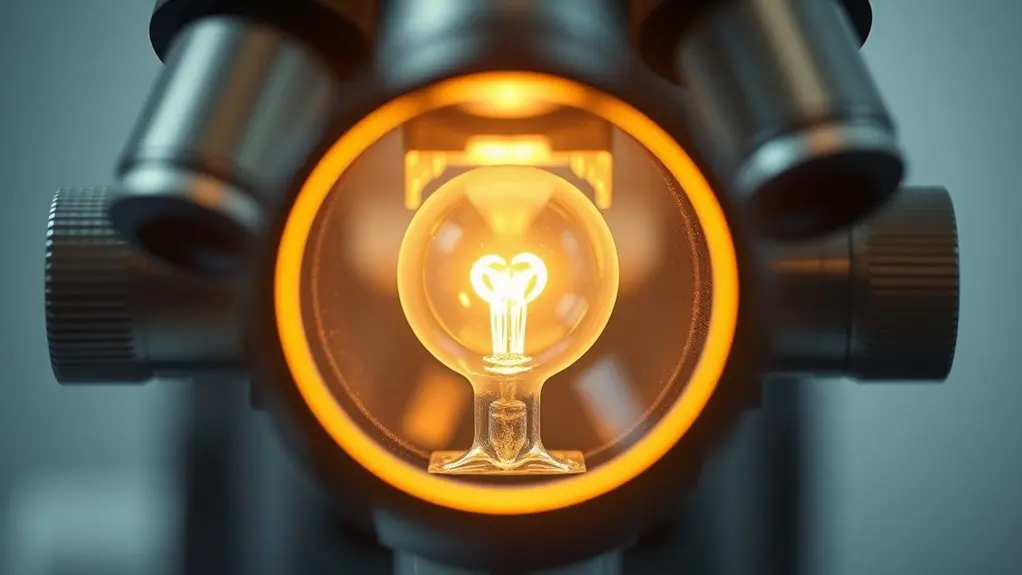
When you adjust the lamp voltage and focus the filament images onto the back focal plane of the condenser, you set the foundation for even illumination.
Next, use transmitted light with a 40x objective to observe the lamp filament images clearly. Horizontally shift the images until they overlap, forming a continuous, even shape.
Then, perform vertical alignment to overlap the filament images by roughly 50%, ensuring balanced light distribution. This precise alignment directly influences the condenser aperture’s effectiveness by providing uniform illumination across the field.
Fine-tune the filament positions until symmetry is achieved, eliminating gaps or uneven brightness.
Proper lamp filament alignment optimizes condenser aperture function, guaranteeing consistent light intensity for high-quality Kohler illumination. It might take a bit of patience, but the results are totally worth it for achieving that perfect, even lighting.
Adjusting the Field Stop Diaphragm for Better Contrast
Although proper lamp filament alignment sets the stage for even illumination, adjusting the field stop diaphragm is vital for enhancing image contrast. The field stop controls the illuminated area, directly influencing stray light and clarity.
To optimize contrast, follow these steps:
- Open the field stop diaphragm until its image just disappears at the edges of the field of view.
- Center the diaphragm using condenser centering screws to ensure uniform illumination.
- Avoid opening the diaphragm beyond the field of view to prevent stray light and reduced contrast.
- Fine-tune the diaphragm size and position to minimize glare and maximize image clarity.
Why Adjusting the Condenser Aperture Improves Images
Because the condenser aperture diaphragm controls the angle of the light cone entering the specimen, adjusting it directly affects both resolution and contrast in your images. When you increase the condenser aperture, you widen the illumination angle, enhancing resolution by allowing more diffraction orders to reach the objective. However, this also introduces more stray light, which lowers contrast and may cause glare.
On the other hand, decreasing the aperture improves contrast by reducing stray light and glare but risks diffraction fringes and diminishes resolution. To optimize image quality, set the condenser aperture to about 60-90% of the light disc diameter. This balance guarantees even illumination, minimizes artifacts, and provides sharper, clearer images.
Precise condenser aperture adjustment is essential for maximizing both illumination efficiency and image contrast during Köhler illumination. Getting this right makes a big difference in how well you can see the details in your specimen.
Common Köhler Illumination Mistakes to Avoid
Mastering Köhler illumination requires careful attention to detail, as common mistakes can considerably degrade image quality. To avoid pitfalls in your illumination setup, focus on these key areas:
- Center the condenser precisely. Misalignment causes uneven illumination and off-center images.
- Adjust the field diaphragm to just fill the view. Over-opening introduces stray light, reducing contrast.
- Set the condenser aperture diaphragm correctly. Too wide lowers resolution; too narrow increases artifacts.
- Always focus the condenser sharply before diaphragm adjustment. Neglecting this blurs and unevenly distributes light.
Also, remember to re-adjust the illumination setup whenever you switch objectives or light sources. Skipping this step compromises image clarity and consistency.
How to Maintain Köhler Illumination for Consistent Results
To maintain Köhler illumination consistently, you need to regularly realign the condenser and field diaphragm, especially after changing the light source or bulb. Perform condenser adjustment by centering and adjusting its height to guarantee homogeneous illumination.
Frequently clean and inspect condenser lenses and diaphragm components to prevent dust from compromising alignment and illumination consistency. Use a test slide to verify even light distribution, recalibrating as necessary.
Also, recheck the aperture diaphragm setting to match the objective and specimen, preserving ideal contrast and resolution.
It’s a good idea to establish a documented maintenance schedule that includes calibration, cleaning, and alignment checks to sustain performance.
Frequently Asked Questions
Can Köhler Illumination Be Used With Fluorescence Microscopy?
Yes, you can use Köhler illumination with fluorescence microscopy. It requires precise optical alignment to guarantee even excitation light distribution and maximize light source quality.
Proper sample preparation complements this by reducing background noise and artifacts.
By adjusting the condenser aperture and field diaphragm, you achieve uniform illumination, which enhances contrast and resolution.
This setup really optimizes fluorescence imaging. It improves your ability to analyze samples accurately and consistently under varying conditions.
What Types of Microscopes Support Köhler Illumination?
Over 90% of advanced microscopy applications rely on precise illumination techniques like Köhler illumination. You’ll find this setup supported across various microscope types, including brightfield, phase contrast, darkfield, and epifluorescence microscopes.
Compound and research microscopes with adjustable condensers are specifically designed for Köhler illumination. Even some digital, stereo, metallurgical, and inverted microscopes incorporate it to enhance image clarity and contrast.
This setup really helps optimize your microscopy workflow effectively. It’s all about getting the best possible image quality, no matter which type of microscope you’re using.
How Does Köhler Illumination Compare to Critical Illumination?
Köhler illumination offers superior optical alignment compared to critical illumination, ensuring precise conjugate planes that enhance light uniformity. When you use Köhler, the light source’s image is focused at the condenser aperture, minimizing artifacts and providing consistent illumination across your brightfield imaging field.
Critical illumination, while quicker to set up, projects the filament directly onto the specimen. This causes uneven lighting and reduced image contrast.
For accurate, high-quality results, Köhler is essential.
Is Köhler Illumination Suitable for Digital Microscopy Cameras?
Think of Köhler illumination as the conductor of a symphony, guaranteeing every instrument plays in harmony. Yes, it’s ideal for digital microscopy cameras because it guarantees lighting uniformity, which is critical for consistent sample preparation.
By achieving precise optical alignment, it minimizes glare and stray light, enhancing image clarity and contrast. This method ensures your digital images are sharp, reproducible, and true to color.
That’s why it’s indispensable for accurate analysis and documentation. It really makes a difference when you want reliable and clear results every time.
Can Köhler Illumination Improve Phase Contrast Microscopy?
Yes, Köhler illumination can notably improve phase contrast microscopy. By ensuring precise optical alignment, you achieve ideal condenser diaphragm positioning, which enhances illumination uniformity across the field.
This uniformity reduces glare and stray light, allowing subtle phase differences in your sample preparation to stand out clearly.
The controlled light cone also enhances phase ring contrast, minimizing artifacts and improving resolution.
Conclusion
Mastering Köhler illumination is like tuning a finely crafted instrument. Each adjustment sharpens your visual symphony. By aligning the lamp filament, tweaking the field stop diaphragm, and optimizing the condenser aperture, you transform scattered light into a precise beam.
This reveals microscopic details with clarity. Avoid common pitfalls and maintain your setup diligently to guarantee consistent, high-contrast images. This technical finesse elevates your microscopy from guesswork to exact science every time you look through the lens.